Departments and user accounts
To help enterprises manage user accounts, 丰盘ECM supports hierarchical organization structures in a tree layout.
Sign in to "Admin Console" with a super administrator account, then open the "Organization Structure" tab on the "User Management" page to create or import your department hierarchy. The organization tree has exactly one root department node, named "My Company" by default; you can rename it. Every user account on the platform, including newly created, imported, or synchronized accounts, is assigned to this root department by default.
Privacy notice
Any signed-in user can browse the organization tree and search basic user information in areas such as the file-sharing panel and the bulk operations page in space management; otherwise, they could not configure user permissions in bulk. If you do not want to expose this information, keep only department levels that are safe to share or use internal code names in department names, such as Aegis Center and Department 007.
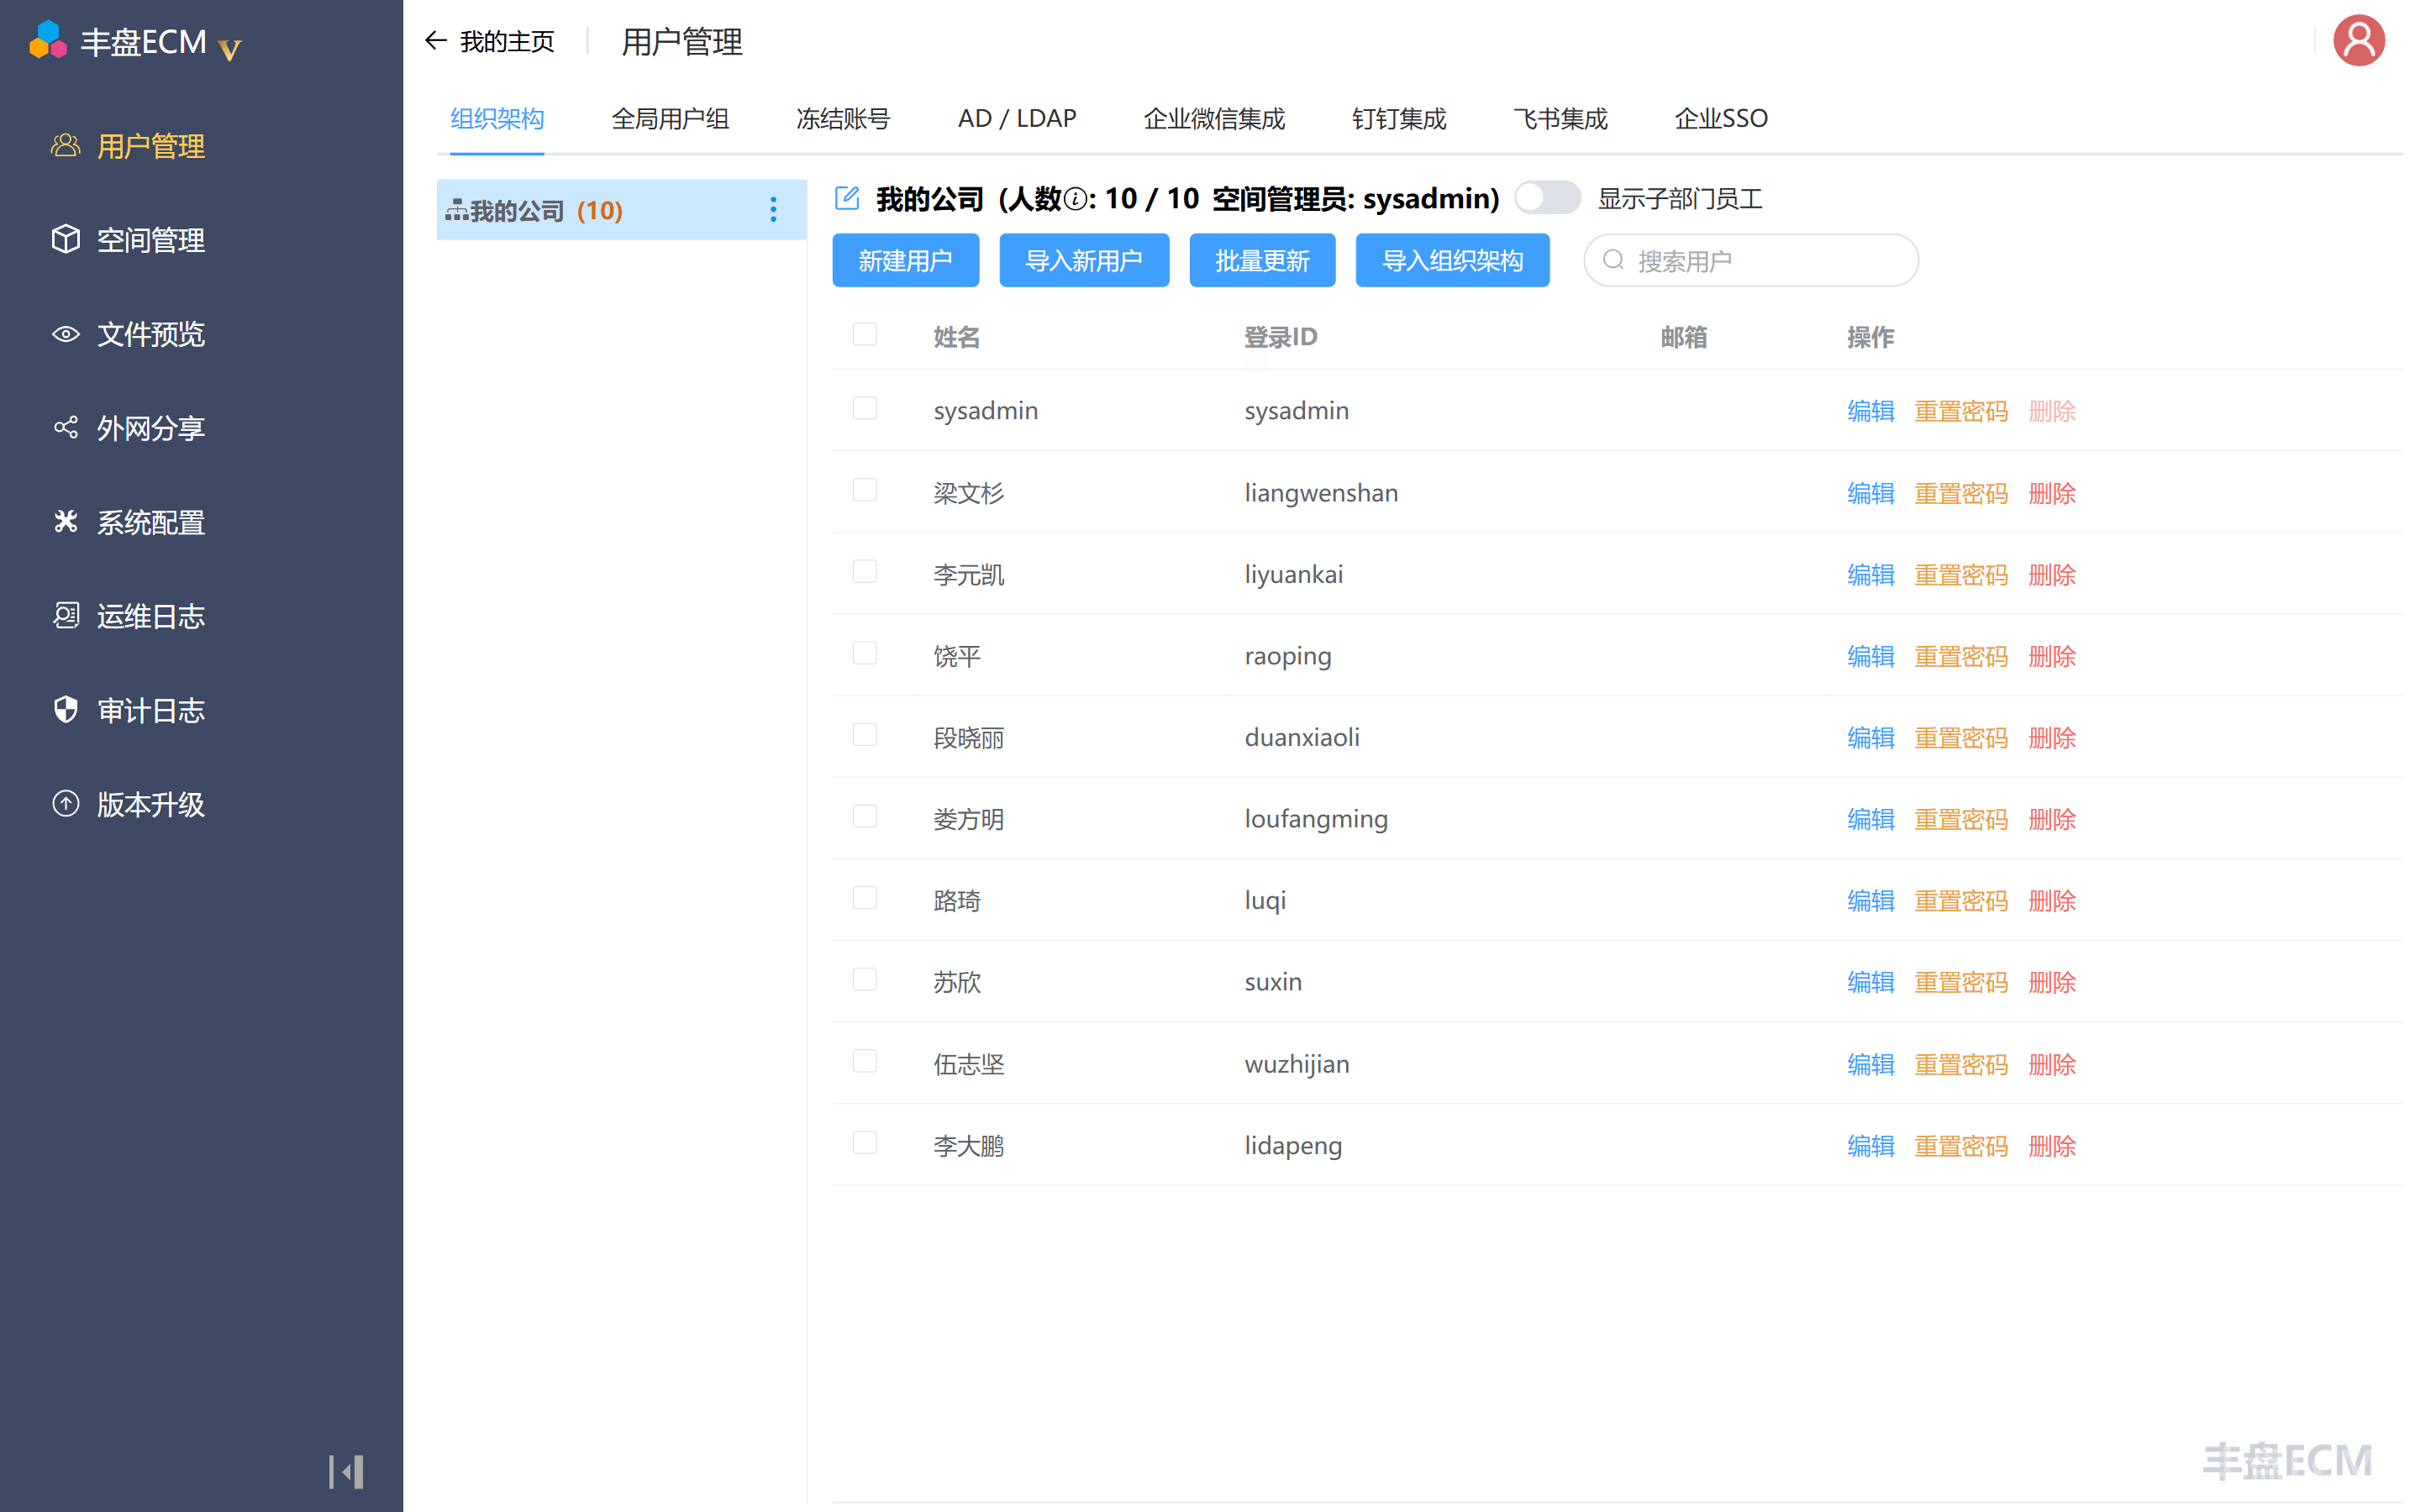
Department management
Department document spaces
丰盘ECM introduces the concept of a department space (see Quick start: document space concepts for more). For every department node in the organization tree, 丰盘ECM automatically creates a document space with the same name and imports all user accounts from that department and its sub-departments, with default permission to browse all files in that space.
For example, when an administrator adds a user to "My Company / Product and Research Center / Artificial Intelligence", the account also joins the three department spaces "My Company", "Product and Research Center", and "Artificial Intelligence". If the user is added only to "My Company / Product and Research Center", the account does not join the child "Artificial Intelligence" department space.
If the head of a large department wants to manage the document spaces of its sub-departments, set that person's account as the owner of every sub-department, or add the account to the sub-departments on the member management page of department space management.
When an administrator changes a user's department, 丰盘ECM automatically removes the account from that department space and adds it to the corresponding other department spaces.
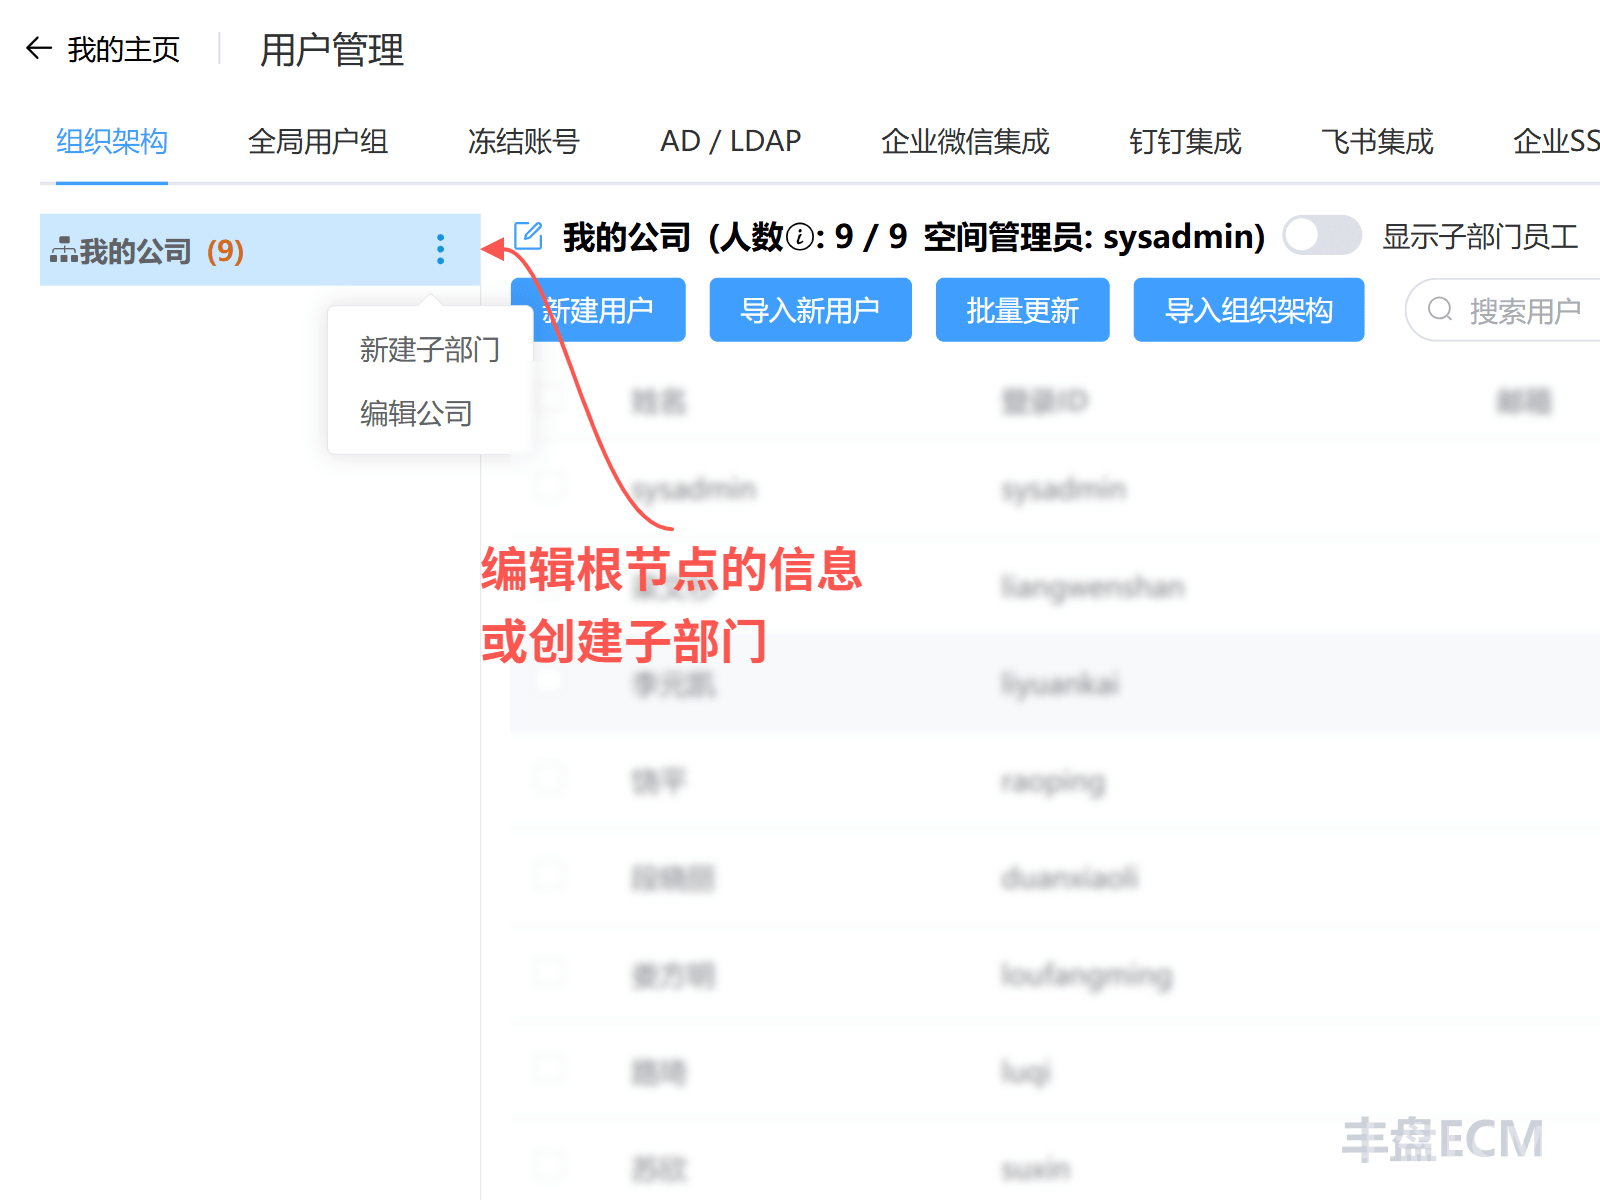
Edit department information
Click the menu to the right of the root node to rename it, for example to "Digital Technology Group", assign a "Space Administrator" to the department space, or create sub-departments level by level. Other department operations work the same way.
Note that sub-departments under the same parent cannot share a name, but departments at different levels can have the same name.
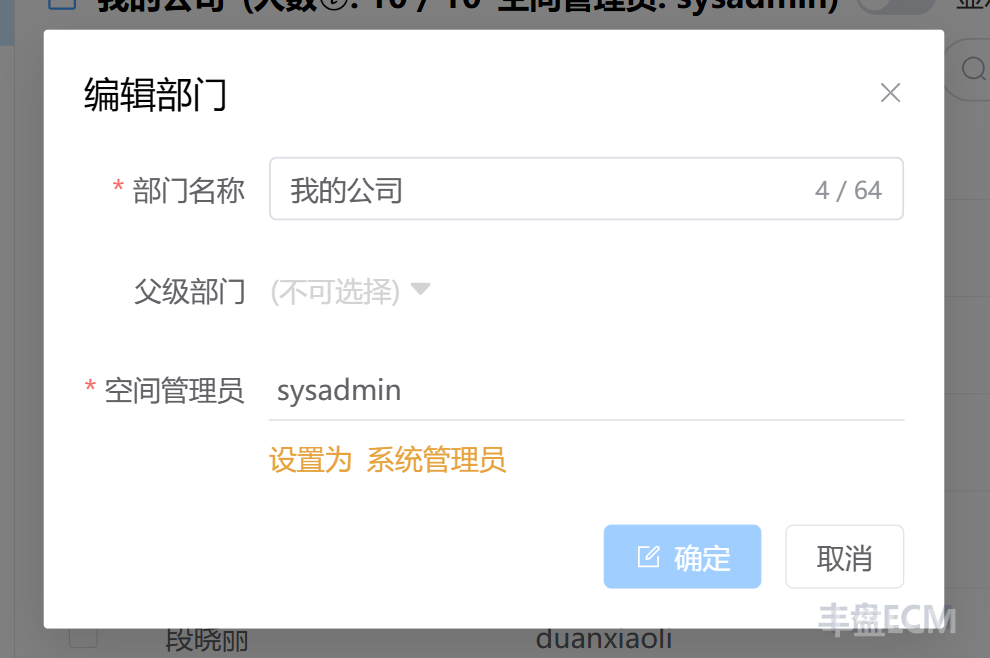
Move a department
When you edit a department node, change the "Direct Parent" field to move the department under another department. The system then updates the relationship between users and departments automatically, with no manual work from the administrator.
Delete a department
You can delete a department (except the root node) and its department space from the menu to the right of the node. Deleting a department is risky: all files stored in the department space are deleted, and users attached to the department move to its parent department automatically.
User accounts
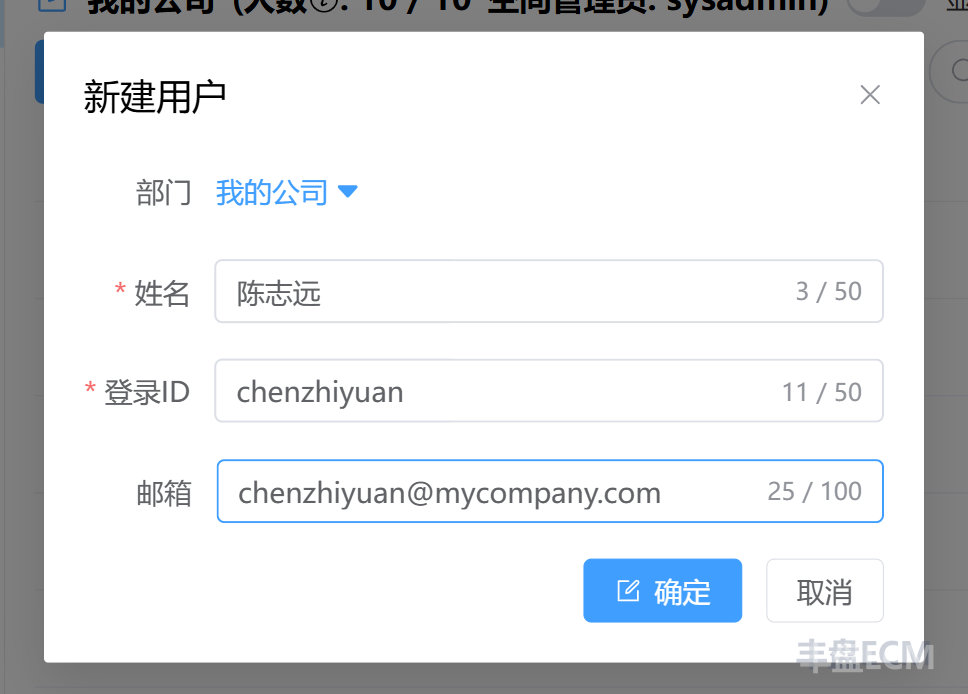
Create or edit a user account
Click "Create Account", then enter the user's name, the unique account ID used to sign in, and the email address for system notifications. If you leave the email address blank, the account cannot receive system email notifications.
Editing an account works the same way.
Info
The sign-in ID is the globally unique identifier of a user account in 丰盘ECM and the account name used to sign in. It cannot be duplicated, but you can change it later without affecting the file resources linked to it. For system integration compatibility, the sign-in ID supports only simple combinations of digits, uppercase and lowercase English letters (case-sensitive), hyphens, and underscores. Examples: zhangsan, zhangwei01, 00012345, hts-123.
Import the organization structure or bulk create accounts
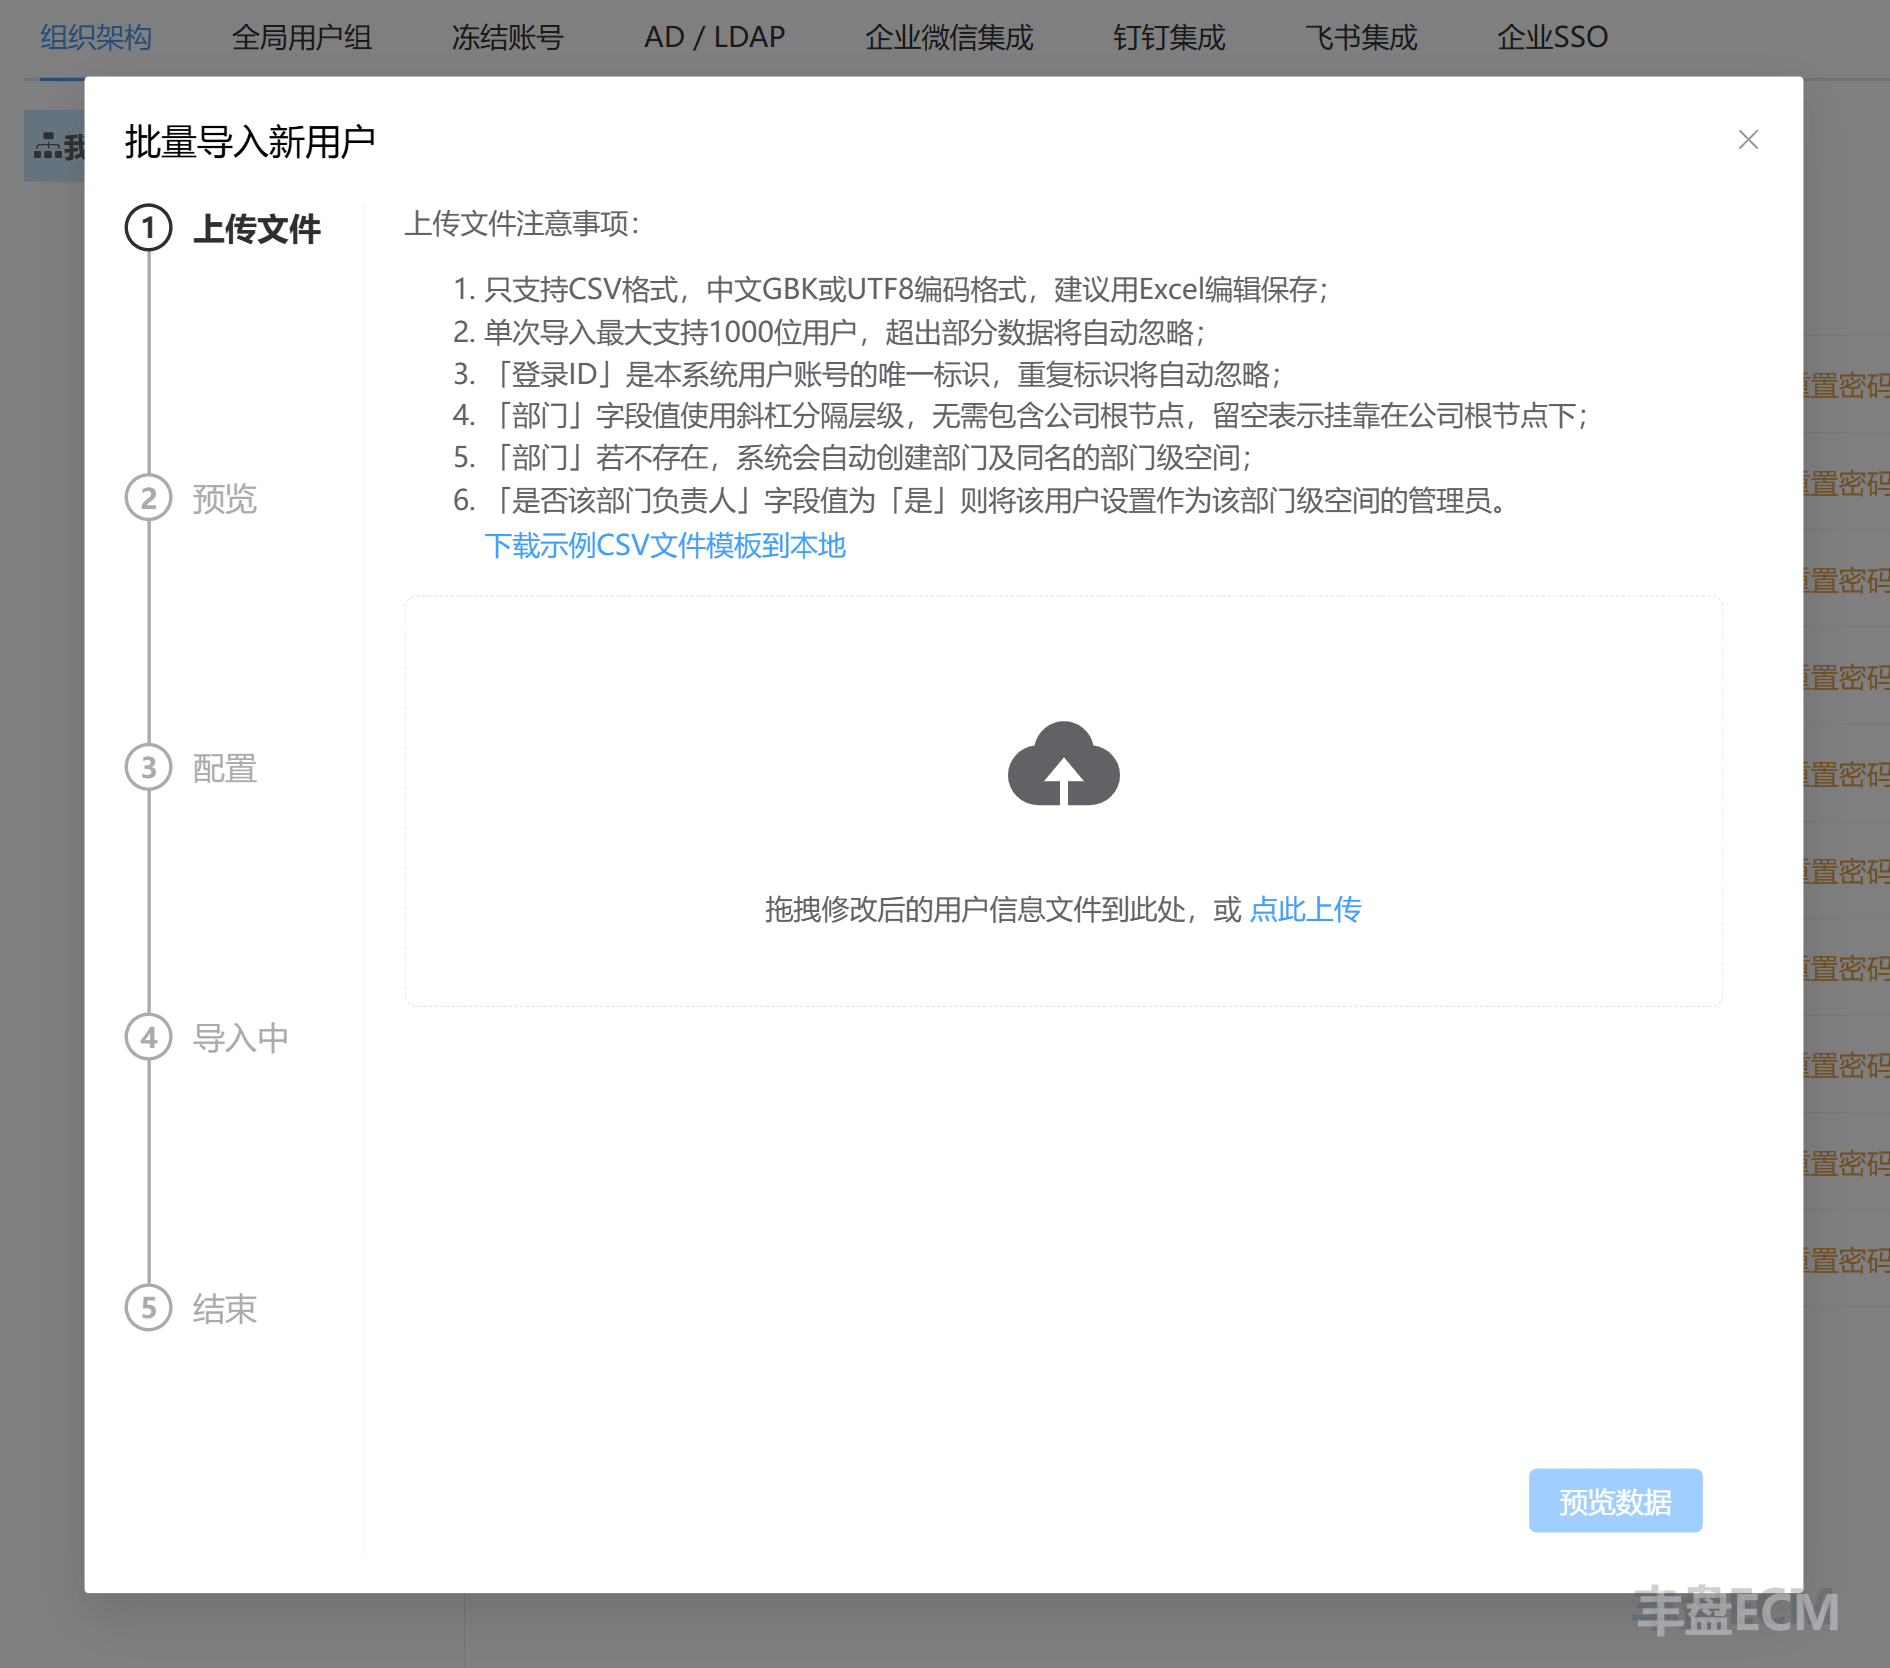
When the organization structure is complex and there are many employee accounts, entering them one by one is slow and error-prone. Use "Import New Users" to edit a CSV template in Excel and upload it for bulk import. During the import, the administrator can set an initial temporary password. After a user signs in with it for the first time, the system prompts the user to set a new password before continuing.
Bulk update accounts or change departments
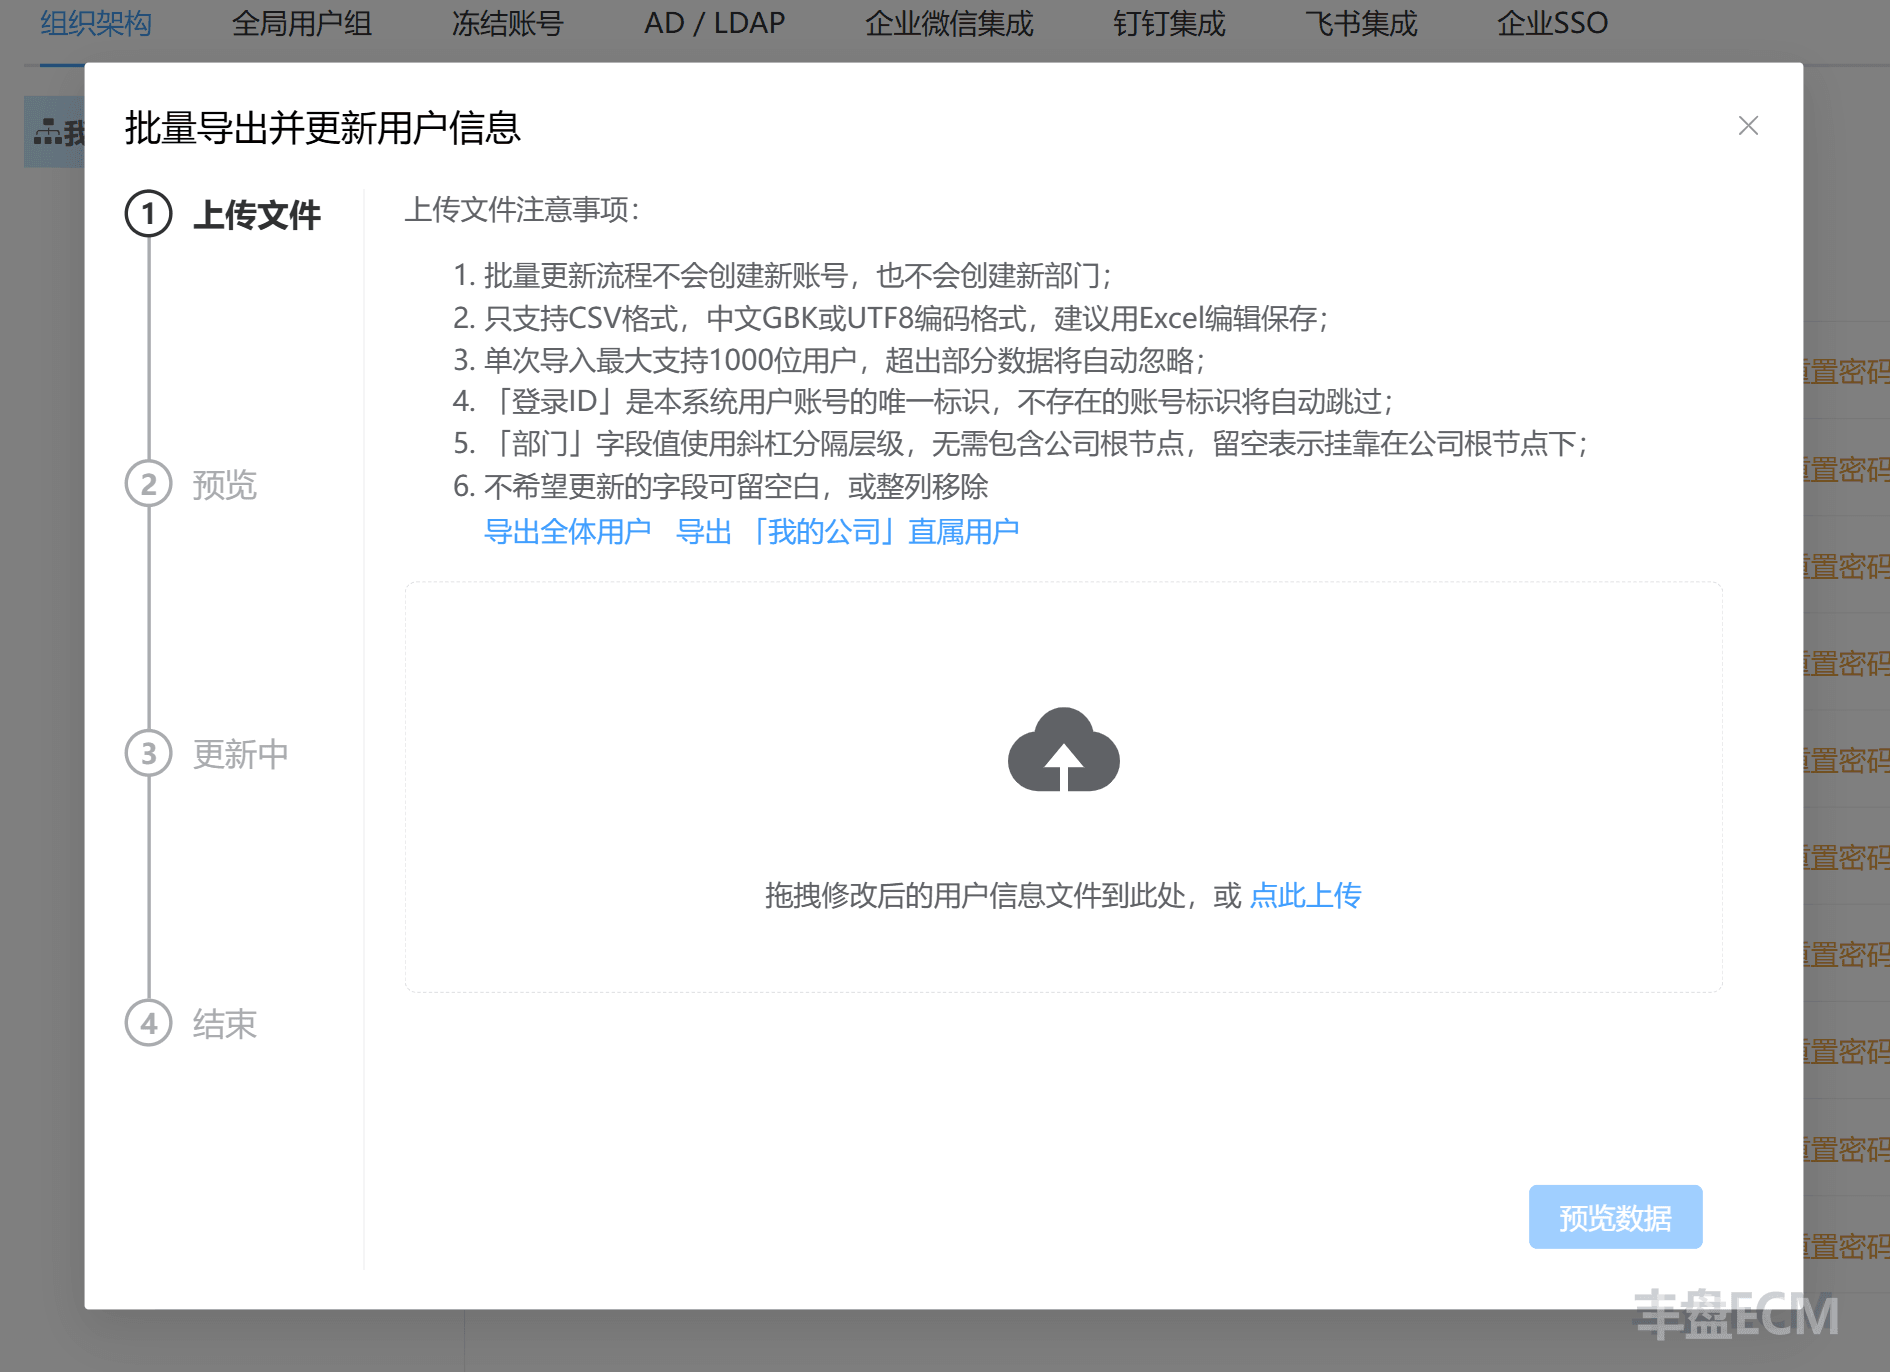
To update many user accounts at once, use "Bulk Update" to export the accounts of the selected department. Edit the CSV file locally in Excel to change sign-in IDs, names, or departments, then upload the file back to the system.
Warning
"Bulk Update" can only attach employees to existing departments. If department information is invalid, the system skips the record while processing accounts one by one and marks it as failed. Download the failed records, fix the errors, and import them again.
Integrate an external account authentication system
To integrate Windows Active Directory or an OpenLDAP-compatible service for single sign-on and account synchronization, see Windows Active Directory / LDAP account authentication and synchronization.
Premium Edition feature: WeCom and DingTalk authentication
To integrate the authentication systems of WeCom or Alibaba DingTalk, contact us or ask your account manager about purchasing a Premium Edition plugin. The Premium Edition also plans to open an integration API so enterprises can connect their own internal SSO system. If your organization needs this urgently, contact your account manager.
Reset an account password
If an employee forgets the password, an administrator can use "Reset Password" to set a new one. The system assigns a temporary password, and after signing in the employee must change it before continuing.
Freeze account sign-in and file permissions
When an employee leaves or an account behaves abnormally (the Premium Edition audit feature helps you spot unusual access), an administrator can freeze the account temporarily or permanently. The account can no longer sign in and its permissions stop working, while the account itself is kept.
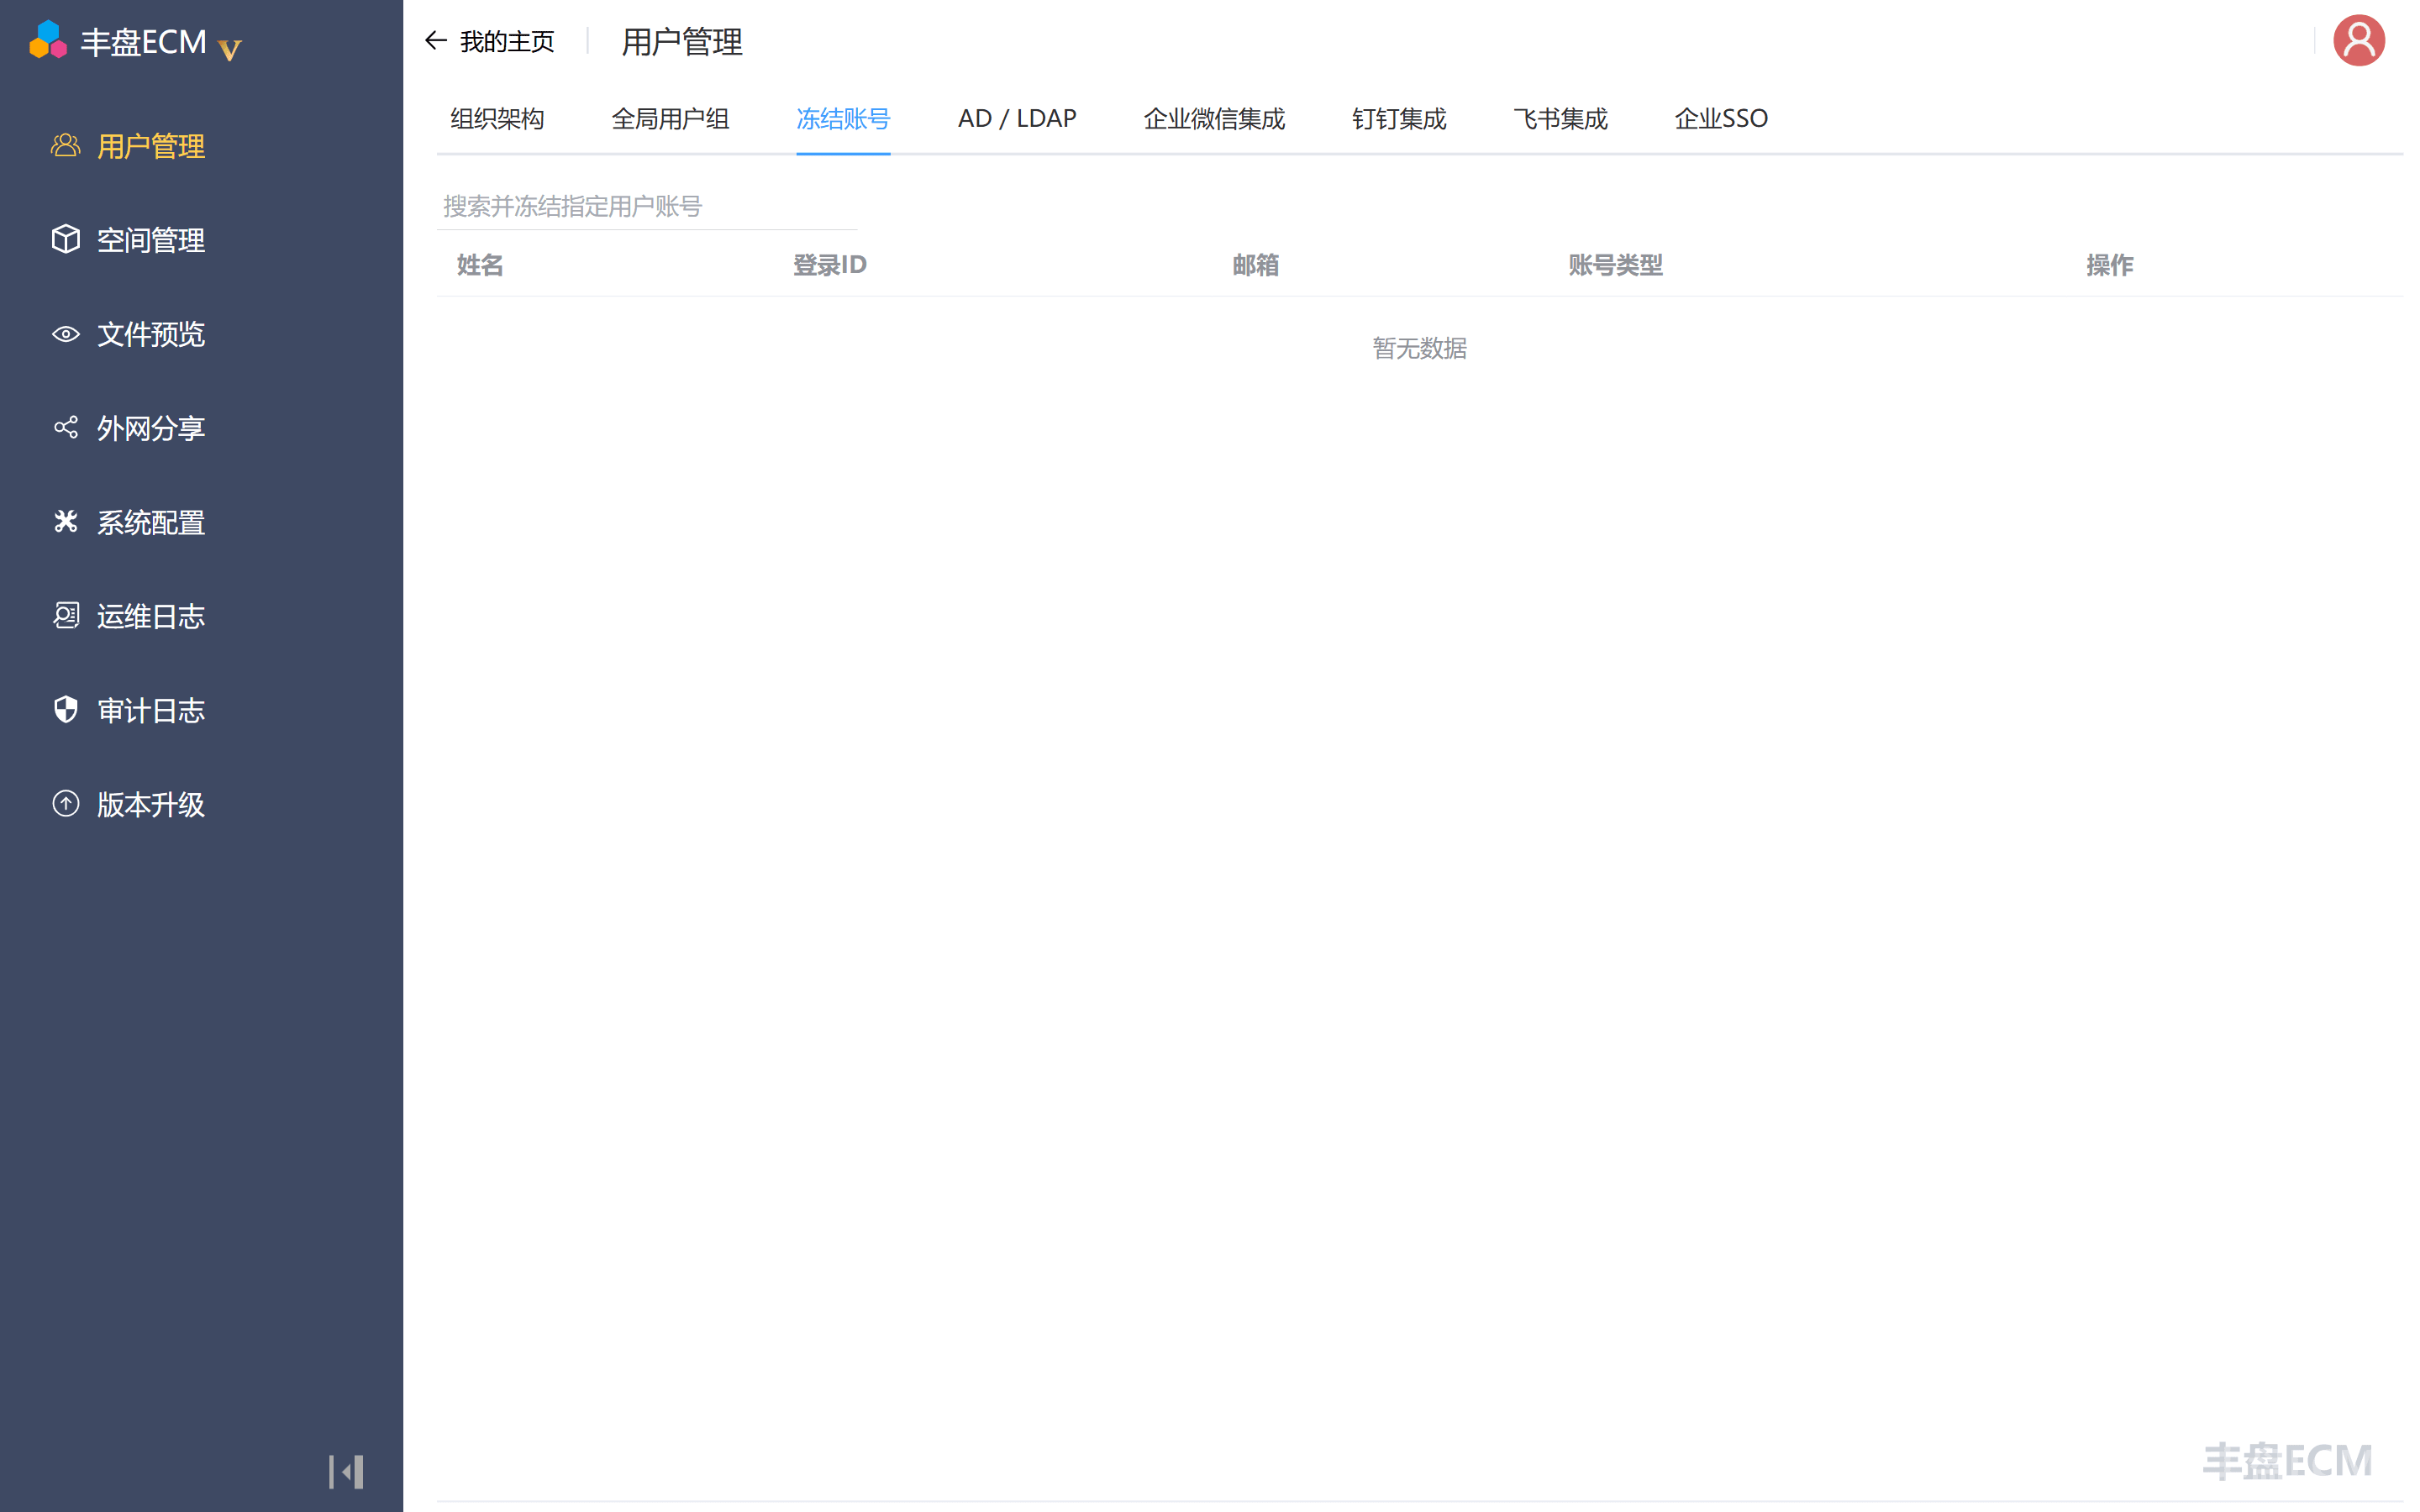
Click "Freeze Account", search for the account, and confirm. To unfreeze, select the account, click "Unfreeze", and confirm. All permissions are restored.
Delete an account and reclaim storage
To reclaim the personal space storage of a user account, delete the account. After deletion, all files in the account's personal space are permanently removed and cannot be undone or restored, and all permissions are revoked, so proceed with care. Files that the account stored in department spaces and project spaces are not affected and are not deleted; a space administrator can transfer ownership of the departing employee's files to another employee. If you only want to block access and keep the employee's personal files, freeze the account instead.